Sunday Bonus Tutorial: Web of Fun Halloween Card


Hello Reader,

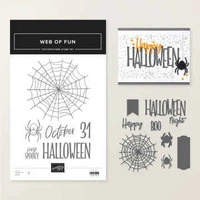
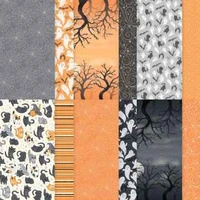
Halloween crafting is here! This week's Sunday Bonus Tutorial features the adorable new Web of Fun Bundle paired with Frightfully Fun Designer Series Paper—both from the latest Stampin' Up! Online Exclusives and AVAILABLE NOW! The bold striped paper does most of the work while the playful spider, web, and oversized Halloween greeting create a card that's festive, fun, and surprisingly simple to assemble.

Today's FREE tutorial includes step-by-step instructions, measurements, and a complete supply list so you can recreate this clean and playful design with ease.

What I Love:

  • The bold Halloween stripes in the Frightfully Fun Designer Series Paper create instant impact with almost no effort.
  • The oversized "Halloween" die-cut becomes the focal point and lets the patterned paper shine.
  • The playful spider and web add just the right amount of spooky without being scary.
  • The clean Basic Black, Very Vanilla and Pumpkin Pie palette is classic Halloween and always eye-catching.
  • A simple layout makes this design quick to recreate for all of your Halloween greetings.
  • Mix-and-match elements from the Web of Fun Bundle make it easy to create cards, treat toppers, and gift tags with the same products.

product spotlight:

  • Web of Fun Bundle - Item 168211
  • Frightfully Fun Designer Series Paper - Item 168168
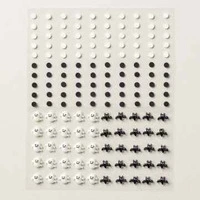
  • Adhesive-Backed Bats Ghosts and Dots - Item 168180
  • Frightfully Fun Suite Collection - Item 168183

measure & cut (from bottom to top):

card base:

  • Very Vanilla Cardstock: 5 1/2 x 8 1/2, scored at 4 1/4 (top)

layers (before die-cutting/punching):

  • Basic Black Cardstock: 5 1/4 x 4
  • Frightfully Fun Designer Series Paper: 5 x 3 3/4
  • Basic Black Cardstock (web): 4 1/2 x 4 1/2 - adhered to an Adhesive Sheet
  • Basic Black Cardstock: 5 1/4 x 2
  • Very Vanilla Cardstock: 5 1/4 x 1 3/4
  • Basic Black Cardstock (halloween): 4 1/2 x 2 - adhered to an Adhesive Sheet
  • Basic Black Cardstock (flagged banner drop shadow): 1 1/2 x 2
  • Very Vanilla Cardstock (sentiment & spider): 3 x 2

stamp (clear blocks or stamp positioning tool):

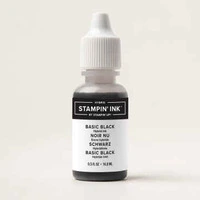
  • Stamp the spider and sentiment in Basic Black Hybrid Ink onto the coordinating Very Vanilla Cardstock piece.

crop, cut, assemble, adhere (from bottom to top) & embellish:

  • Burnish the fold of the card base with a Bone Folder.
  • Layer and adhere the Designer Series Paper piece & Basic Black Cardstock together with Multipurpose Liquid Glue and to the card base with Stampin' Dimensionals.
  • Use a Stampin' Cut & Emboss Machine (Standard) to crop the web and Halloween (Basic Black), Very Spooky sentiment and spider (stamped) using the Web of Fun dies.
  • Remove the adhesive backing from the web die-cut and adhere to the card as shown.
  • Layer and adhere the Very Vanilla & Basic Black strips together with Multipurpose Liquid Glue and to the card with Stampin' Dimensionals.
  • Remove the adhesive backing from the HALLOWEEN die-cut and adhere to the card as shown.
  • Adhere the Very Spooky flagged banner die-cut to the Basic Black flagged banner die-cut, slightly offset to create a drop-shadow, with Multipurpose Liquid Glue.
  • Adhere the sentiment and spider to the card as shown with Stampin' Dimensionals.
  • Embellish with 2 black dots. (Adhesive-Backed Bats Ghosts & Dots).


EXPERIENCE MATTERS! Since becoming a Stampin’ Up! demonstrator in 2007, my priority has been to provide excellent customer care. My success as a top 25 U.S. demonstrator year after year relies on providing customer satisfaction, consistency and happiness!

ABOUT MARY! Learn more about my Stampin' Up! journey here.

THE TOP 5 REASONS MY CUSTOMERS SHOP WITH ME!

  1. GRATITUDE! I’m so grateful for your business! Place an on-line order with me as your Stampin’ Up! demonstrator and you’ll receive an immediate thank you email with confirmation of how many tulip rewards you earned.
  2. SERVICE! You’ll receive a follow-up email after your order delivers to be sure everything is perfect and answer any questions.
  3. INSPIRATION & IDEAS! Subscribe here to my daily email updates and receive card and organization ideas, free step-by-step tutorials, exclusive paper crafting resources, Stampin’ Up! new product drops and special offers.
  4. GET REWARDED! A customer favorite! Shop thru me as your Stampin’ Up! demonstrator and earn tulips toward FREE Stampin’ Up! bundles & stamp sets with my Tulip Rewards Loyalty Program.
  5. ABOUT MARY! Learn more about my Stampin' Up! journey here.

ARE YOU SUBSCRIBED?

Did a friend forward this email to you? I’m so glad you’re here! GET 150+ CARD SKETCH IDEAS FREE! Simply sign up for my newsletter today & instantly receive a digital gift of 150+ Card Sketch Ideas that you can save or print! PLUS, you’ll receive my latest card ideas and tutorials, special offers, new product drops and exclusive “subscriber-only” resources.


get rewarded when you shop with stampin’ pretty

When you shop with me, you can earn exclusive Tulip Rewards with orders of $50 or more—PLUS enjoy Stampin’ Up! Stampin’ Rewards starting at just $20! Tap the buttons below to get all the details!

Update Your Email Profile or Preferences | Unsubscribe from ALL Emails

Stampin' Pretty, LLC 3425 Valley Creek Circle, Middleton, WI 53562

Stampin' Pretty, LLC

GET 100+ CARD SKETCH IDEAS FREE! Simply sign up for my newsletter today & instantly receive a digital gift of 100+ Card Sketch Ideas that you can save or print! PLUS, you’ll receive my latest card ideas and tutorials, special offers, new product drops and exclusive “subscriber-only” resources.

Read more from Stampin' Pretty, LLC

Hello Reader, The NEW Stampin’ Hot Foil products are available now, and this card shows just how beautifully they can transform a simple design! The delicate gold-foiled leaves add instant elegance while the soft gray botanical images create depth without competing with that gorgeous metallic shine. The gold-foiled sentiment—“Here’s to a lifetime of happiness”—looks especially striking against Basic Black cardstock. A few gold Adhesive-Backed Metallic Gems finish the card with just the right...

Hello Reader, THE WAIT IS OVER! The NEW Stampin' Up! Hot Foil System is AVAILABLE, bringing beautiful foil accents and elegant shine to your handmade cards and paper crafting projects. If you've been curious about hot foiling, this is the perfect time to jump in. Designed exclusively for Stampin' Up! products, the new system makes it easy to add stunning metallic details with professional-looking results. A Helpful Hot Foil Tip For the smoothest, most polished foiled results, I recommend...

Hello Reader, Get ready to add a little metallic magic to your handmade cards! The NEW Stampin’ Hot Foil line from Stampin’ Up! is available tomorrow, July 10, and today’s card gives you a beautiful peek at the shine, detail, and wow factor this new system brings to paper crafting. Today's FREE tutorial includes step-by-step instructions, measurements, and a complete supply list so you can recreate this clean and playful design with ease. What I Love The instant elegance the foil adds to a...