FREE TUTORIAL! A Peaceful Garden Fun-Fold Gift Card Holder!


Hello Reader,

Today I’m sharing the project inspired by yesterday’s exclusive sketch—an elegant fun-fold gift card holder featuring the stunning Peaceful Garden Suite Collection from Stampin’ Up! Soft blues, botanical patterns, and those graceful doves come together for a serene “Peace on Earth” design that feels timeless and heartfelt.

This layout opens to reveal a perfectly sized pocket for a gift card (hello, holiday gifting!) and a clean panel for your personal message. It’s simple, layered, and so satisfying to create—exactly the kind of project I love sharing with you.

Use the sketch as your starting point, then let your favorite designer papers and die-cut elements make it your own.

If you missed yesterday’s sketch, be sure to take another look. It’s the perfect starting point for creating with your favorite Stampin’ Up! suites.


product spotlight:


measure & cut (from bottom to top):

card base:

  • Secret Sea Cardstock: 4 1/4 x 11, scored at 2 1/2 and 5 1/2

layers (before die-cutting):

  • Basic White Cardstock: 5 1/4 x 4
  • Secret Sea Cardstock: 4 x 2 3/4
  • Secret Sea Cardstock: 3 3/4 x 2 (die-cut label)
  • Basic White Cardstock: 2 1/2 x 3 3/4 (die-cut doves)
  • Peaceful Garden Designer Series Paper (sizing listed by design):

Light Design:

  • 1/2 x 4 strip
  • 2 1/4 x 4
  • 2 3/4 x 4
  • 3 3/4 x 2 1/2

Dark Design:

  • 3/4 x 4 strip
  • 2 x 3 3/4
  • 2 1/2 x 3 3/4
  • 4 x 2 1/4 (die-cut label)

stamp:

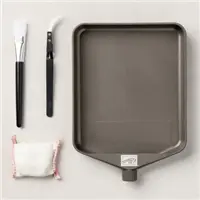
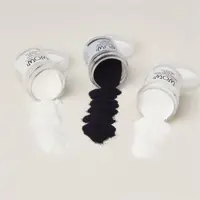
  • Use a Clear Block D or Stamp Positioning Tool to stamp the sentiment (Peace on Earth Stamp Set) in Versamark Ink onto the 3 3/4 x 2 piece of Secret Sea Cardstock. Cover with White Basics Wow Embossing Powder, tap to remove excess and set with a Heat Tool.

crop, cut, assemble & adhere:

  • Burnish the two folds of the fun fold card base with a Bone Folder.
  • Adhere the Basic White layer to the inside of the card base with Multipurpose Liquid Glue.
  • Adhere the two Designer Series Paper strips as shown to the edge of the Basic White layer with Multipurpose Liquid Glue.
  • Layer and adhere the two coordinating panels of light and dark Designer Series Paper together and to the outside of the folds as shown with Stampin' Dimensionals.
  • Add two strips of Tear & Tape Adhesive to the top and bottom edges of the far left fold.
  • Zip that same edge through a Stampin' Cut & Emboss Machine (Standard) with the largest label die just over the edge as shown. NOTE: Because you are cutting through 3 layers, you may have to use Paper Snips to help free the cropped piece.
  • Remove the Tear & Tape backing and adhere to the inside of the card.
  • Tuck the gift card inside the pocket you just created.
  • Wrap the card with Cloud Cover 3/8" Faux Linen, securing on the right with a bow.
  • Adhere the Designer Series Paper to the Secret Sea panel as shown above.
  • Adhere the sentiment and Designer Series Paper die-cuts together and to the card with Stampin' Dimensionals. NOTE: When adhering to the card, be sure to only adhere the left side to the top panel.
  • Crop the two doves using a Stampin' Cut & Emboss Machine (Standard or Mini) from the remaining piece of Basic White Cardstock.
  • Adhere to the labels as shown with Stampin' Dimensionals.

embellish:

  • Add 2 Cloud Cover Hues of Blue Flowers as shown.

For the very first time, Stampin' Up! is celebrating Black Friday with savings up to 40% off select products.

Sale Dates: Tuesday, November 25 – Monday, December 1

Deals will be revealed November 25 in the online store. Visit using the link below and be ready to shop the moment the sale begins!

Starting December 1 at 8 a.m. (MT), Stampin' Up! is offering big savings on prepaid Paper Pumpkin subscriptions!
From December 1–9, prepaid Paper Pumpkin subscriptions will be discounted as follows:

3-mo. prepaid: $61.00 (save $20)
6-mo. prepaid: $122.00 (save $40)
12-mo. prepaid: $244.00 (save $80)


EXPERIENCE MATTERS! Since becoming a Stampin’ Up! demonstrator in 2007, my priority has been to provide excellent customer care. My success as a top 20 U.S. demonstrator year after year relies on providing customer satisfaction, consistency and happiness!

ABOUT MARY! Learn more about my Stampin' Up! journey here.

THE TOP 5 REASONS MY CUSTOMERS SHOP WITH ME!

  1. GRATITUDE! I’m so grateful for your business! Place an on-line order with me as your Stampin’ Up! demonstrator and you’ll receive an immediate thank you email with confirmation of how many tulip rewards you earned.
  2. SERVICE! You’ll receive a follow-up email after your order delivers to be sure everything is perfect and answer any questions.
  3. INSPIRATION & IDEAS! Subscribe here to my daily email updates and receive card and organization ideas, free step-by-step tutorials, exclusive paper crafting resources, Stampin’ Up! new product drops and special offers.
  4. GET REWARDED! A customer favorite! Shop thru me as your Stampin’ Up! demonstrator and earn tulips toward FREE Stampin’ Up! bundles & stamp sets with my Tulip Rewards Loyalty Program.
  5. ABOUT MARY! Learn more about my Stampin' Up! journey here.

Update Your Email Profile or Preferences | Unsubscribe from ALL Emails

Stampin' Pretty, LLC 3425 Valley Creek Circle, Middleton, WI 53562

Stampin' Pretty, LLC

GET 100+ CARD SKETCH IDEAS FREE! Simply sign up for my newsletter today & instantly receive a digital gift of 100+ Card Sketch Ideas that you can save or print! PLUS, you’ll receive my latest card ideas and tutorials, special offers, new product drops and exclusive “subscriber-only” resources.

Read more from Stampin' Pretty, LLC

Hello Reader, Ready for a little creative twist? This week’s Stampin’ Pretty Newsletter Exclusive Sketch is a clean, simple fun-fold gift card holder — perfect for holiday giving, birthdays, thank-yous, and more. With layered panels, easy measurements, and a charming focal point for your sentiment, it’s the kind of design that looks fancy but comes together in a snap. Use your favorite Designer Series Paper, mix in a pop of texture, and let the layout do the work! Stay tuned—tomorrow I’ll...

A simple card with white panels and black foliage die-cuts

Hello Reader, Add a touch of modern elegance to your next handmade card! This gorgeous design showcases newly released Stampin’ Up! favorites — the Friendly Foliage Stamp Set and Petals of Beauty Dies — paired with a soft neutral palette and bold black accents. It’s clean, simple, and effortlessly chic — a perfect example of how less can truly be more. Follow along with my step-by-step tutorial to recreate it—or switch up the colors and sentiment to make it your own. I CASE’d a Stampin’ Up!...

A Simple Merry Christmas Card using the Elegant Pine Snowflakes Designer Series Paper

Blog Hop! An Elegant Pine Snowflakes Christmas Card Idea This month’s Pals Blog Hop theme is Seasons Greetings, and I’m sharing a clean and simple Christmas card that lets the Elegant Pines Snowflakes Designer Series Paper shine! The dark, festive background paired with a crisp “Merry Christmas” sentiment creates timeless holiday elegance. A touch of twine and a few Festive Pearls complete this easy-to-duplicate design—perfect for spreading cheer with handmade cards this season. click for...