FREE TUTORIAL! A Fresh Gatefold Card with Garden Gatherings


Hello Reader,

Yesterday’s subscriber-exclusive sketch has come to life as a gorgeous gatefold card with a removable belly band!

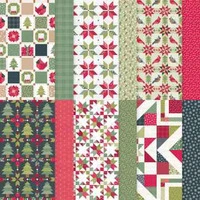
The sweet floral pattern from A Stitched Season Designer Series Paper proves this collection is not just for Christmas. Paired with the Garden Gatherings Bundle, it creates a fresh, timeless design that can be shared throughout the year.

The combination of Secret Sea, Basic White, Peaceful Pine and Old Olive feels crisp and sophisticated. I love how the white die-cut flowers pop against the deeper foliage and vase, while the tiny Secret Sea accents add the perfect finishing touch.

The belly band keeps the gatefold neatly closed and becomes the focal point of the card. Simply slide it off to reveal the layered panels and coordinating design inside.

what I love:

The unexpected year-round use of the A Stitched Season Designer Series Paper, the clean floral arrangement and the beautiful surprise waiting beneath the belly band.

Be sure to download today’s FREE tutorial for the measurements, complete supply list and step-by-step instructions!

YAY! ALL SKETCHBOOKS ARE NOW INTERACTIVE. You asked for it and I delivered! These sketchbooks are FREE resources that will make your card making easier! Just open the PDF, click on the image of the sketch and it opens a card idea with sizing, step-by-step tutorial and a product list!


product spotlight:

  • A Stitched Season Designer Series Paper - Item 168223
  • Garden Gatherings Bundle - Item 167611
  • Christmas & Birthday Cards Shared Previously (click on image for details)

measure & cut (from bottom to top):

card base:

  • Basic White Thick Cardstock: 8 ½ x 5 ½, score at 2 ⅛ and 6 ⅜

layers (before die-cutting/punching):

  • Secret Sea Cardstock: 1 ⅞ x 5 ¼ (qty 2)
  • A Stitched Season Designer Series Paper: 1 ¾ x 5 (qty 2)
  • Secret Sea Cardstock: 9 ½ x 1 ½, score at 2 ¾ x 7 ⅛ (belly band)
  • Secret Sea Cardstock: 3 ¼ x 4
  • Basic White Cardstock: 3 x 3 ¾
  • Peaceful Pine Cardstock: 1 ¼ x 3 (die-cut stem)
  • Secret Sea Cardstock: 2 ½ x 3 (die-cut stem & vase)
  • Basic White Cardstock: 1 ¼ x 3 (die-cut flowers)
  • Basic White Cardstock: 4 x 1 1/2 (sentiment)
  • Secret Sea Cardstock: 5 ¼ x 4 (inside)
  • Basic White Cardstock: 5 x 3 ¾ (inside)

envelope flap:

  • A Stitched Season Designer Series Paper: 5 3/4 x 2 1/4

stamp (clear blocks or stamp positioning tool):

  • Stamp the sentiment in Secret Sea Classic Ink onto the Basic White Cardstock layer.

cut, assemble, adhere & embellish:

  • Burnish the folds of the card base with a Bone Folder.
  • Layer and adhere the Designer Series Paper to the Secret Sea Cardstock panels together and to the card base as shown with Multipurpose Liquid Glue.
  • Wrap the center of the card base with the Secret Sea belly band. Fold and adhere with Multipurpose Liquid Glue, leaving the seam in front where it will be hidden.
  • Layer and adhere the Basic White and Secret Sea cardstock (smaller rectangles) together with Multipurpose Liquid Glue and to the belly band with Stampin' Dimensionals.
  • Use a Stampin' Cut & Emboss Machine (Standard) to crop the vase, stems and flowers with coordinating Garden Gathering dies.
  • Adhere together and to the card as shown with Standard and Mini Stampin' Dimensionals.
  • Adhere the sentiment as shown with Standard (left side of vase) and Mini (right side of vase) Stampin' Dimensionals.
  • Embellish the flower centers with Secret Sea Moody Palette Glossy Dots.
  • Layer and adhere the Basic White and Secret Sea cardstock together and to the inside of the card base with Multipurpose Liquid Glue.

envelope:

  • Adhere the 5 3/4 x 2 1/4 Designer Series Paper to a Basic White Medium envelope flap with Multipurpose Liquid Glue. Tip: Add glue to the flap, not the Designer Series Paper.


AVAILABLE NOW! Online Exclusive Products and a NEW Product of the Month from Stampin’ Up! are available to order! These special-release products (not in any catalog) include NEW bundles, suites, designer series paper collections and embellishments — perfect for clean, classy & coordinated card making.

Update Your Email Profile or Preferences | Unsubscribe from ALL Emails

Stampin' Pretty, LLC 3425 Valley Creek Circle, Middleton, WI 53562

Stampin' Pretty, LLC

GET 100+ CARD SKETCH IDEAS FREE! Simply sign up for my newsletter today & instantly receive a digital gift of 100+ Card Sketch Ideas that you can save or print! PLUS, you’ll receive my latest card ideas and tutorials, special offers, new product drops and exclusive “subscriber-only” resources.

Read more from Stampin' Pretty, LLC

Hello Reader, Today’s Stampin’ Pretty Newsletter Exclusive Sketch adds a playful twist to a classic layered design! Three vertical panels create plenty of opportunity to mix patterns, colors or textures, while the bold sentiment panel takes center stage. Add a few die-cut details and embellishments to make Sketch #161 uniquely yours. save or print this sketch! Be sure to watch your inbox tomorrow. I’ll reveal my finished card inspired by this sketch and share a FREE step-by-step tutorial with...

Hello Reader, The Stampin’ Up! Hot Foil System brings this butterfly beauty to life with layers of rich color and brilliant gold shine. Pretty Peacock cardstock creates the dramatic backdrop, while softly blended Pretty Peacock, Soft Sea Foam and Pool Party inks add delicate color to the Butterfly Flight images. Gold hot foil details from the Botanical Glow, Flourish & Frames and Sweetly Sentimental Hot Foil Dies finish the card with an elegant glow. WHAT I LOVE! The rich Pretty Peacock...

Hello Reader, This week’s Stampin’ Pretty Newsletter Exclusive Sketch features a bold, decorative label as the star of the design. Add your favorite patterned paper, a simple sentiment and a few well-placed embellishments for a polished card that’s easy to customize for any occasion. save or print this sketch! Be sure to watch your inbox tomorrow. I’ll reveal my finished card inspired by this sketch and share a FREE step-by-step tutorial with the complete supply list and cutting measurements....