FREE Tutorial! Exclusive Sketch-Inspired Creations Using Floral Charm


Hello Reader,

Yesterday’s exclusive sketch was just the beginning! Today, I’m excited to share two handmade card designs that bring that sketch to life using the beautiful new Floral Charm Suite from Stampin’ Up! These cards showcase the elegant dies, coordinating designer series paper, and fresh florals—all with my signature clean and simple style. Whether you're drawn to bold layers or soft silhouettes, there’s inspiration here to spark your next cardmaking session!


measure & cut (from bottom to top):

card base:

  • Basic White Thick Cardstock: 4 1/4 x 11, scored at 5 1/2

layers (from bottom to top):

  • Pool Party or Night of Navy Cardstock: 4 x 5 1/4
  • Floral Charm Designer Series Paper: 3 1/2 x 5
  • Pool Party or Basic White Cardstock: 3 1/8 x 1 1/4
  • Pretty Peacock or Night of Navy (qty 2) Cardstock: 3 x 3 (before die-cutting)
  • Basic White Cardstock: 4 x 4 or 2 1/2 x 4 (before die-cutting)
  • Pool Party or Basic White Cardstock (sentiment) : 2 x 3/4 (before trimming/die-cutting)

envelope:

  • Floral Charm Designer Series Paper: 5 3/4 x 2 1/4

stamp:

  • Use a Clear Block C or Stamp Positioning Tool to stamp the sentiment(s) (Charming Day Stamp Set) in Pretty Peacock or Night of Navy Classic Ink onto the coordinating sentiment layer.

crop:

  • Use a ​​Stampin’ Cut & Emboss Machine​​ (Standard) to crop the following:
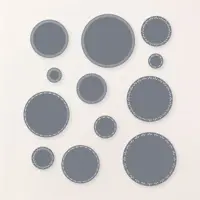
    • Pretty Peacock: 2 3/4 Spotlight on Nature Circle Die
    • Night of Navy: 2 & 2 1/2 Stylish Shapes Circle Dies
    • Basic White: Charming Day Floral Dies
    • Basic White: 1 1/2 x 1/2 Stylish Shape Sentiment Die

assemble & adhere:

  • Burnish the fold of the card base with a Bone Folder.
  • Adhere the Floral Charm Designer Series Paper to the coordinating cardstock layer as shown with Multipurpose Liquid Glue.
  • Adhere the 3 1/8 x 1 1/4 piece of cardstock to the card as shown with Multipurpose Liquid Glue.
  • Double wrap all layers with white Baker's Twine Essentials, securing with a bow. Adhere the layer to the card base with Stampin' Dimensionals.
  • Adhere the circle & floral die-cuts and sentiments together and to the card as shown with Stampin' Dimensionals.

embellish:

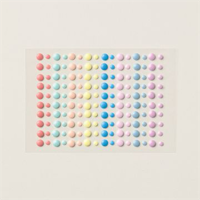
  • Embellish with 3 Pool Party Rainbow Dots or 3 Night of Navy Charming Shimmer Faceted Dots as shown.

envelope flap:

  • Adhere the 5 3/4 x 2 1/4 Designer Series Paper to a Basic White Medium envelope flap with Multipurpose Liquid Glue. TIP: Add glue to the flap, not the Designer Series Paper.

Final Days to Save on 2025–2027 In Color Products!
Don’t miss your chance to stock up on the stunning 2025–2027 In Colors—now 15% off! From cardstock to ink pads and more, these trendy hues are the perfect way to refresh your crafting collection. Hurry—this offer ends August 31!


STAMPIN’ UP! CLEARANCE & LAST CHANCE PRODUCTS!

Snag amazing deals on deeply discounted products—up to 70% off—before they’re gone for good!

What Are Stampin’ Up! Last Chance & Discounted Clearance products?

  • Limited Availability: These products are retiring and only available while supplies last! They will be discontinued (unavailable) once sold out.
  • Discounts May Vary: Not all Stampin’ Up! retiring products are discounted.
  • Please note: Some items will sell out quickly due to high demand.

Update Your Email Profile or Preferences | Unsubscribe from ALL Emails

Stampin' Pretty, LLC 1501 Edgehill Dr, Madison, WI 53705-1448

Stampin' Pretty, LLC

GET 100+ CARD SKETCH IDEAS FREE! Simply sign up for my newsletter today & instantly receive a digital gift of 100+ Card Sketch Ideas that you can save or print! PLUS, you’ll receive my latest card ideas and tutorials, special offers, new product drops and exclusive “subscriber-only” resources.

Read more from Stampin' Pretty, LLC

Hello Reader, I’m thrilled to share an exclusive card tutorial that pairs perfectly with yesterday’s sketch inspiration! This clean and simple design was created with the Layers of Beauty Bundle by Stampin’ Up! and highlights how easy it is to achieve a layered, hand-painted look with coordinating stencils and dies. With just a few thoughtful details, you’ll have a card that’s both elegant and heartfelt. save or print the sketch layers of beauty bundle blending brushes measure & cut (from...

a sketch idea for a handmade card

Hello Reader, Looking for a fresh way to bring your cardmaking to life? This week’s exclusive sketch was inspired by a Stampin’ Up! card creation and is designed to make clean and simple cardmaking a breeze. Whether you’re reaching for bold layers or keeping it minimal, this sketch gives you the perfect starting point to create something uniquely yours. measure & cut: card base: 5 1/2 x 8 1/2, scored at 4 1/4 layers (from bottom to top): 3 7/8 x 2 7/16 negative die-cut 3 x 3/8 sentiment save...

16 Hilarious Halloween DIY Cards & Gifts 16 Hilarious Halloween DIYs You’ll Love From punny cards to laugh-out-loud gift ideas, this spooky collection will have you smiling while you craft. click for FREE tutorials & card ideas! FREE STAMPIN' PRETTY RESOURCES! Project ideas, tutorials, sketches, color combinations, wow videos, color charts and more! Explore ALL of my FREE resources here.