Yesterday’s Sketch in Action: Free Christmas Card Tutorial


Hello Reader,

Today’s card showcases the Traditions of Christmas Designer Series Paper and the Traditional Labels Bundle, elevated with just the right touch of Gold Foil. The combination is classic and festive, perfect for holiday card making.

This design is based on yesterday’s exclusive sketch, making it simple to recreate while still leaving room for your personal touches. Whether you keep it traditional or swap in your favorite paper and foil accents, this layout is a versatile go-to for your Christmas crafting.

new stampin' up! products used on this card -

Some of the newest Stampin’ Up! products that were used on this card have made it onto my Favorite Things list! These are the tools, stamps, and supplies I reach for again and again because they make creating so much fun. Curious what made the cut? You can see all of my favorite things, including these fresh picks, right here: My Favorite Things.


Looking for inspiration for inside card sentiments? Visit my Christmas Card Ideas & Resource Page, filled with clean & simple card and sketch ideas, color combinations, interior sentiments, and more. Here’s a little sampling of what you’ll find:

Classic & Elegant

  1. “May your holidays be filled with joy, your heart with love, and your home with laughter.”
  2. “Wishing you a sparkling season of peace, love, and timeless traditions.”
  3. “Warmest wishes for a beautiful holiday season and a New Year of happiness.”
  4. “Season’s Greetings! May the timeless message of Christmas fill your heart with joy.”
  5. “Wishing you every happiness this holiday season and throughout the coming year.”

measure & cut (from bottom to top):

card base:

  • Real Red Cardstock: 4 1/4 x 11, scored at 5 1/2

layers (from bottom to top & before die-cutting):

  • Basic White Cardstock: 4 x 5 1/4
  • Traditions of Christmas Designer Series Paper: 3 3/4 x 5
  • Gold Foil: 3 3/4 x 3
  • Traditions of Christmas Designer Series Paper: 3 x 5
  • Basic White Cardstock: 3 1/2 x 2 1/2 (before die-cutting)

envelope:

  • Traditions of Christmas Designer Series Paper: 5 3/4 x 2 1/4

stamp:

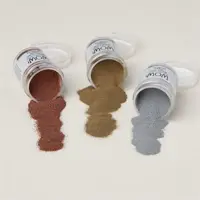
  • Use a Clear Block D or Stamp Positioning Tool to stamp the sentiment (Traditional Labels Stamp Set) in Versamark Ink onto the Basic White sentiment layer that has been rubbed with an Embossing Buddy. Cover with Gold Metallics WOW Embossing Powder. Set with a Heat Tool.
  • Check out my favorite Heat Embossing Tips here.

crop:

assemble & adhere:

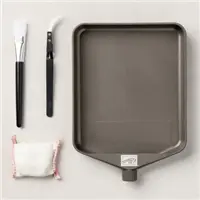
  • Burnish the fold of the card base with a Bone Folder.
  • Adhere the Basic White layer to the card base with Multipurpose Liquid Glue.
  • Adhere the Gold Foil and Designer Series Paper layers together with Multipurpose Liquid Glue.
  • Adhere the Designer Series Paper layer as shown with Stampin' Dimensionals.
  • Wrap with White & Gold Baker's Twine, securing with a bow as shown.
  • Adhere to the layer and the sentiment to the card with Stampin' Dimensionals.

embellish:

  • Embellish with 3 Strawberry Slush & Pretty in Pink Gems.

envelope flap:

  • Adhere the 5 3/4 x 2 1/4 Designer Series Paper to a Basic White Medium envelope flap with Multipurpose Liquid Glue. TIP: Add glue to the flap, not the Designer Series Paper.

request print copies of stampin’ up! catalogs:

current customers = FREE CATALOGS:

  • Customers who place an order with me will receive a thank you and link for free catalogs! Learn more here about the perks & rewards of shopping with me!

new customers = FREE CATALOGS plus just $5 to ship:

  • Planning to place your next Stampin' Up! order through me but want copies of the catalogs first? Request current catalogs for just $5 (covers shipping)!

Update Your Email Profile or Preferences | Unsubscribe from ALL Emails

Stampin' Pretty, LLC 1501 Edgehill Dr, Madison, WI 53705-1448

Stampin' Pretty, LLC

GET 100+ CARD SKETCH IDEAS FREE! Simply sign up for my newsletter today & instantly receive a digital gift of 100+ Card Sketch Ideas that you can save or print! PLUS, you’ll receive my latest card ideas and tutorials, special offers, new product drops and exclusive “subscriber-only” resources.

Read more from Stampin' Pretty, LLC
A graphic of a card sketch with measurements next to it

Hello Reader, Today’s Stampin’ Pretty Exclusive Sketch is designed to make layering simple and stylish! With step-by-step measurements for each layer, you can mix and match your favorite papers, dies, and sentiments to create a card that’s truly your own. Whether you keep it clean and simple or dress it up, this sketch is the perfect starting point for any occasion. measure & cut: card base: 4 ¼ x 11, scored at 5 ½ layers/sizing bottom to top: 4 x 5 ¼ layer 3 ¾ x 5 layer 3 ¾ x 3 layer 3 X 5...

a handmade card with a gingerbread man that has a broken leg.  the sentiment says "oh snap"

Hello Reader, Love this playful design? I took inspiration from one of my favorite Stampin’ Up! catalog designs and resized the original card from 4 1/2" x 6 1/2" to the classic A2 size (4 1/4" x 5 1/2"). With a mix of cheerful colors, embossing, and a little heat-embossed “snap,” this sweet gingerbread card is the perfect blend of fun and festive. Follow along with my step-by-step tutorial to recreate it—or switch up the colors and sentiment to make it your own. 1. measure & cut: card base:...

A whimsical holiday card using the Patterned Tags and Words for the Season by Stampin' Up!

Hello Reader, Get inspired by this free holiday card tutorial based on yesterday's sketch idea! I’ve combined several of the NEW Stampin’ Up! products that made it onto My Favorite Things to create a festive and fun design you’ll want to try. Perfect for your holiday crafting this season! save or print the sketch new stampin' up! products used on this card - Some of the newest Stampin’ Up! products that were used on this card have made it onto my Favorite Things list! These are the tools,...